
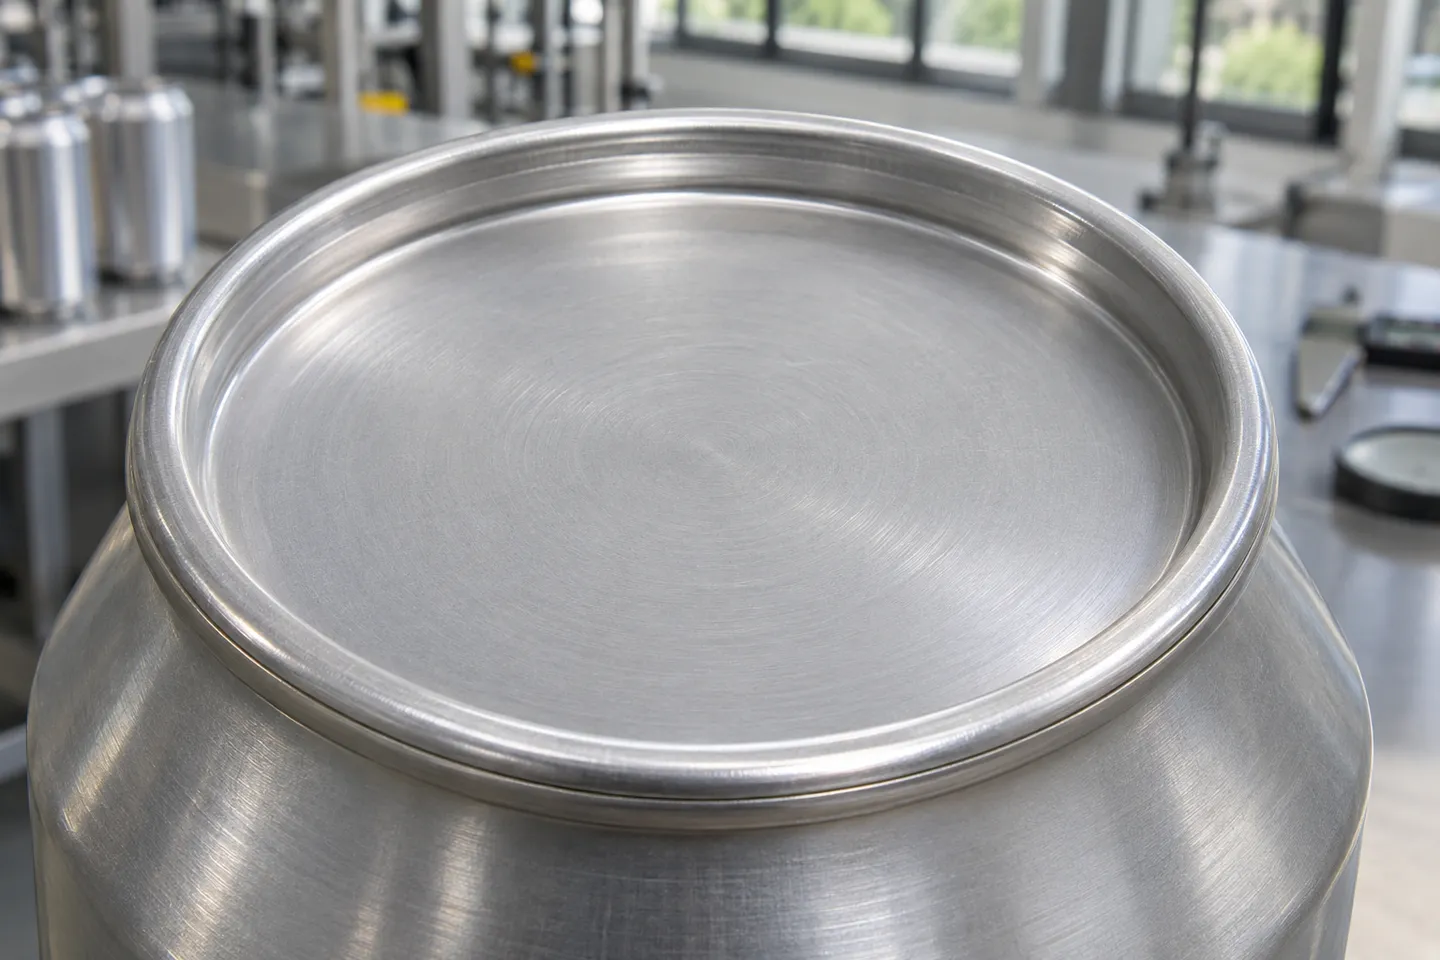
Look at the top rim of any sealed food or beverage can and you will see a shallow, flat band of folded metal running all the way around it. That band is the double seam, and it is the reason the contents inside stay sterile, carbonated, and safe. A double seam is the mechanical joint between a can body and its end, the lid. The flange of the body and the curled rim of the end are rolled together into one interlocked profile (Crown, 2026). Cross-sectioned, a finished seam shows five layers of metal folded into each other: three from the end and two from the body (HSYL Food Equipment, 2026).
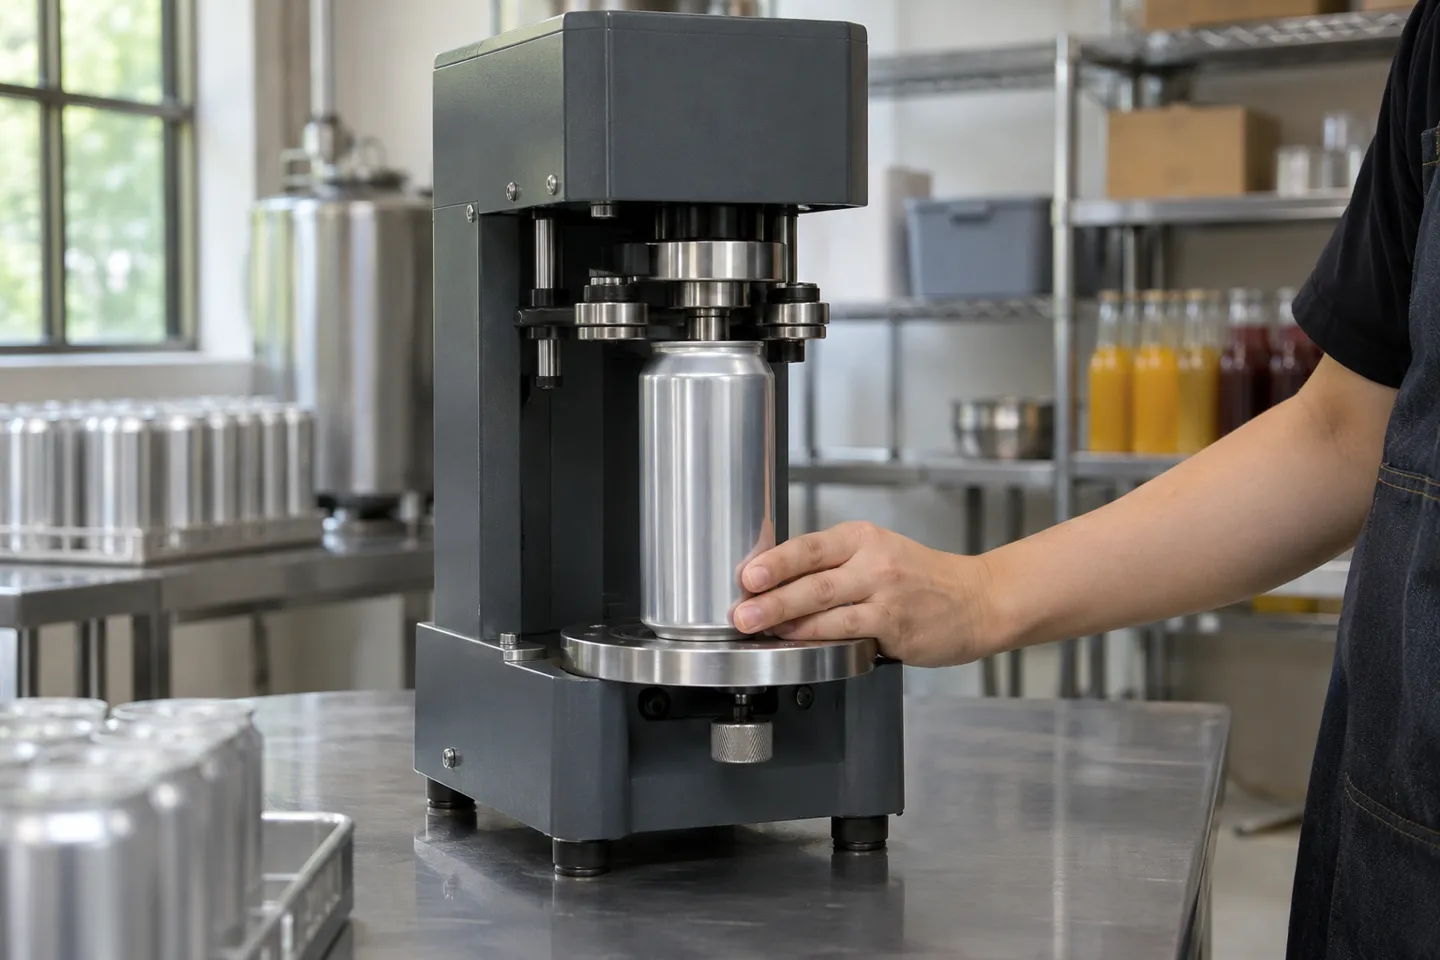
The seam is formed inside a can seamer. Its seamer head has three working parts: a chuck that holds the lid in place, a first-operation roll, and a second-operation roll. The first roll curls the lid’s edge down under the body flange. The second roll presses that loose fold flat into its final geometry. A sealing compound pre-applied to the lid rim sits between the metal layers and acts like a gasket, filling the microscopic channels that metal-on-metal contact cannot close (Seam School, 2023).
That last point is where most newcomers get it wrong. Tight metal does not equal airtight. The seam has two jobs, and they are separate. The mechanical interlock holds the lid on under pressure and handling. The compound seals the paths a liquid or a microbe could sneak through. A seam can look perfectly flat and still leak, because hermetic sealing is judged by what happens inside the seam, not by its outside appearance (AFDO, 2011).
One clarification before going further. Double seam is a packaging term. The same words appear in sewing (a double-stitched seam) and in roofing (a double-lock standing seam), and search results mix all three. Everything below is about the canning joint only.
So the seam itself is one mechanism. What changes its behavior is what you are feeding into the seamer.
What You Are Seaming: Bodies, Ends and Seal Types
Every double seam is a three-way combination: a can body, an end, and a sealing layer. Each of the three axes changes how the seam forms and what can go wrong.
The body side is about the flange. Steel and aluminum bodies form flanges that roll predictably under seaming pressure. A PET plastic body behaves differently. Its flange is formed when the can is blow-molded, its wall is thicker in the flange zone, and it cannot take the same roll pressures as metal without deforming. Cardboard composite cans sit in between, with a metal rim laminated to the paper body.
The end side is about the curl and the opening style. The three opening styles you will meet in plastic and metal easy-open cans are the pull-tab end, the peel-off foil end, and the full-aperture end. Each has a different rim profile, which changes the cover hook geometry the seamer has to form. Screw caps and heat-sealed films are not double-seam closures at all. Plastic bottles with threaded necks and cups sealed with lidding film follow a completely different sealing path, so this article does not apply to them.
The sealing layer is the quiet half of the joint. Metal food ends carry a rolled-on sealing compound. Peel-off ends add an aluminum foil heat-seal layer. Many PET easy-open cans rely on the foil plus a compressed gasket rather than a wet compound. If the compound or foil is missing, damaged, or squeezed out by over-tight rolls, the interlock can be flawless and the can will still leak.
You can place your own setup on this map in one pass.
What Feeds Your Seamer
| Component | Options | What It Changes in the Seam |
|---|---|---|
| Can body | Steel/tinplate, aluminum, PET plastic, paper composite | Flange width and formability, roll pressure the seam can survive |
| End type | Pull-tab, peel-off foil, full-aperture (screw caps and film lids are not double seams) | Cover hook geometry, opening experience |
| Sealing layer | Sealing compound, aluminum foil seal, gasket | Whether the interlocked seam is actually airtight |
| Equipment | Hand-crank, desktop semi-auto, fully automatic rotary | Roll pressure control, repeatability, defect rate |
Source: standard canning industry practice
Knowing which combination you run raises the next question, and it is the first real fork in the road.
Choosing Between Metal and PET Can Systems
The Seaming Mechanics Are Not Interchangeable
The same word “double seam” covers two different mechanical realities. On a metal system, the body hook and cover hook are formed from steel or aluminum skins that tolerate high roll pressures and spring back consistently. On a PET system, the body hook is plastic. It forms under lower pressure, and it loses shape if the roll pressure is copied from a metal setup. The lid is usually an aluminum easy-open end whose curl was designed at the can maker’s tooling, not on your seamer. Regulators make the same point for metal cans: suggested seam dimensions vary with can shape, size, and material thickness (CFIA, 2026). Plastic pushes that variability further, which is why PET seam targets come from the container supplier rather than from any published table.
The defect signatures also split. Metal seams fail in classic ways: wrinkles from loose second-operation rolls, cut or sharp seams from over-tight ones. PET seams add deformation failures the metal world rarely sees, because the body flange itself can mushroom or bend instead of the metal fatiguing. A leak on a plastic can is at least as likely to be a container tolerance problem as a machine problem.
What the Equipment Side Demands
Desktop and manual can sealers dominate small-batch PET and slim-can work. These machines do not hide setup errors the way production lines do: one worn roll or one loose chuck shows up immediately as leakers. Even the machine vendors put numbers on it. KegLand’s documentation for its Cannular desktop seamer gives explicit acceptance values for its slim cans. Calculated overlap must sit above 0.4 mm, with second-operation seam thickness around 1.2 to 1.3 mm and seam height around 2.3 to 2.4 mm (KegLand, 2026). Industrial steel food cans live at different values. Their teardown templates list nominal seam widths of roughly 2.9 to 3.1 mm and thicknesses of 1.2 to 1.35 mm. And one can maker’s 202/211 end spec sheet calls for a first-operation seam thickness of 1.93 plus or minus 0.05 mm (HSYL Food Equipment, 2026; Ball can specs, 2026). Same joint, same vocabulary, completely different numbers.
Where Each System Wins
The choice is product-first, not process-first. Carbonated beverages, beer, and anything retort-sterilized still belong to aluminum and steel: the seam is proven at high internal pressure and through sterilization cycles. PET easy-open cans win wherever the product sells cold or ambient. That includes drinks where seeing the product matters, like milk tea, coffee, juice, and clear snack packs. It also covers e-commerce, where weight and breakage are real shipping costs. The trend line supports the plastic side for those categories. The PET beverage packaging market was valued at USD 33.11 billion with a projected CAGR of 4.67% (Market Research Future via Yahoo Finance, 2023). Supplier-side demand from bubble tea and coffee chains has been the visible driver in Asia.
Boundaries to check before you commit, as concrete steps. Confirm whether your product is hot-filled or carbonated, because standard PET tolerates only about 60 to 65 °C and is not recommended for hot filling (OUTSTANDING FAQs, 2026). Confirm your sterilization method, because retorting rules out plain PET. Confirm your distribution model, because retail shelves and e-commerce parcel networks punish heavy or fragile packaging differently.
Metal vs PET Can Systems at the Seam
| Dimension | Metal (Steel/Aluminum) System | PET Plastic System |
|---|---|---|
| Body hook material and behavior | Metal skin, high roll pressure tolerance, predictable springback | Plastic flange, lower pressure window, deforms if metal settings are copied |
| End and sealing layer | Compound-lined metal ends | Compound or foil-sealed aluminum ends |
| Typical seam targets | Seam width about 2.9-3.1 mm on steel food cans, first-op thickness 1.93±0.05 mm on a 202/211 end (Ball spec) | Desktop slim-can values: overlap >0.4 mm, thickness 1.2-1.3 mm, height 2.3-2.4 mm (KegLand) |
| Signature defects | Wrinkles, cut/sharp seams, droop | Flange deformation, mushroomed flange, plus all metal-type defects |
| Best fit | Carbonated drinks, retort food, high-volume lines | Cold/ambient beverages, clear-product drinks, e-commerce snack packs |
Source: Ball Can Source, KegLand, HSYL teardown guide
Whoever you choose, the decision only pays off if you can prove the seams are good. That proof is a measurement routine, not a feeling.
How to Measure a Double Seam and Judge It
Seam quality is decided with two instruments and one spec sheet. External measurements catch drift early. A destructive teardown shows what the eye cannot. And the container supplier’s specification sheet defines “good”. The regulatory baseline for low-acid canned food in the US makes the same split. Visual seam checks run at intervals not exceeding 30 minutes of operating time. Destructive teardown examination runs at intervals not exceeding 4 hours per seamer head (FDA, 2014). Even if you run a desktop machine with no regulatory obligation, that rhythm is a sound template: check the outside often, cut one open regularly.
The teardown sequence
- 1
External pass: measure seam height, seam thickness and countersink at three points around the rim with a seam micrometer.
- 2
Cut the panel: remove the end panel, leaving about 5 mm of rim attached to the seam.
- 3
Section the seam: saw a thin cross-section if you use a projector, or nip the outer lip for a manual peel.
- 4
Peel and read: peel the cover hook away, exposing the body hook, then measure hook lengths and grade wrinkles.
Source: HSYL Food Equipment teardown guide, 2026
External Measurements: The Early-Warning Trio
Three numbers come off the can without destroying it. Seam height (sometimes called seam width or length) is the vertical dimension of the finished seam. Seam thickness is the compressed horizontal dimension, and it is the most sensitive indicator of second-operation roll pressure. Countersink is the depth from the seam’s top edge down to the end panel, and a shallow countersink on one side points to a tilted seam. Measure at least three points around the circumference, 120 degrees apart, and avoid the side-seam weld on three-piece cans (HSYL Food Equipment, 2026). When one of the three drifts, you have caught the problem while it is still one can deep instead of one pallet deep.
Teardown: The Only Verdict That Counts
The final judgment of a double seam can only be made on the torn-down seam together with its measurements (AFDO, 2011). Peeling the end exposes the two hooks whose interlock is the seam’s backbone. The body hook (BH) is folded down from the body flange. The cover hook (CH) is folded up inside it from the end. The four internal parameters are hook lengths, overlap, and tightness.
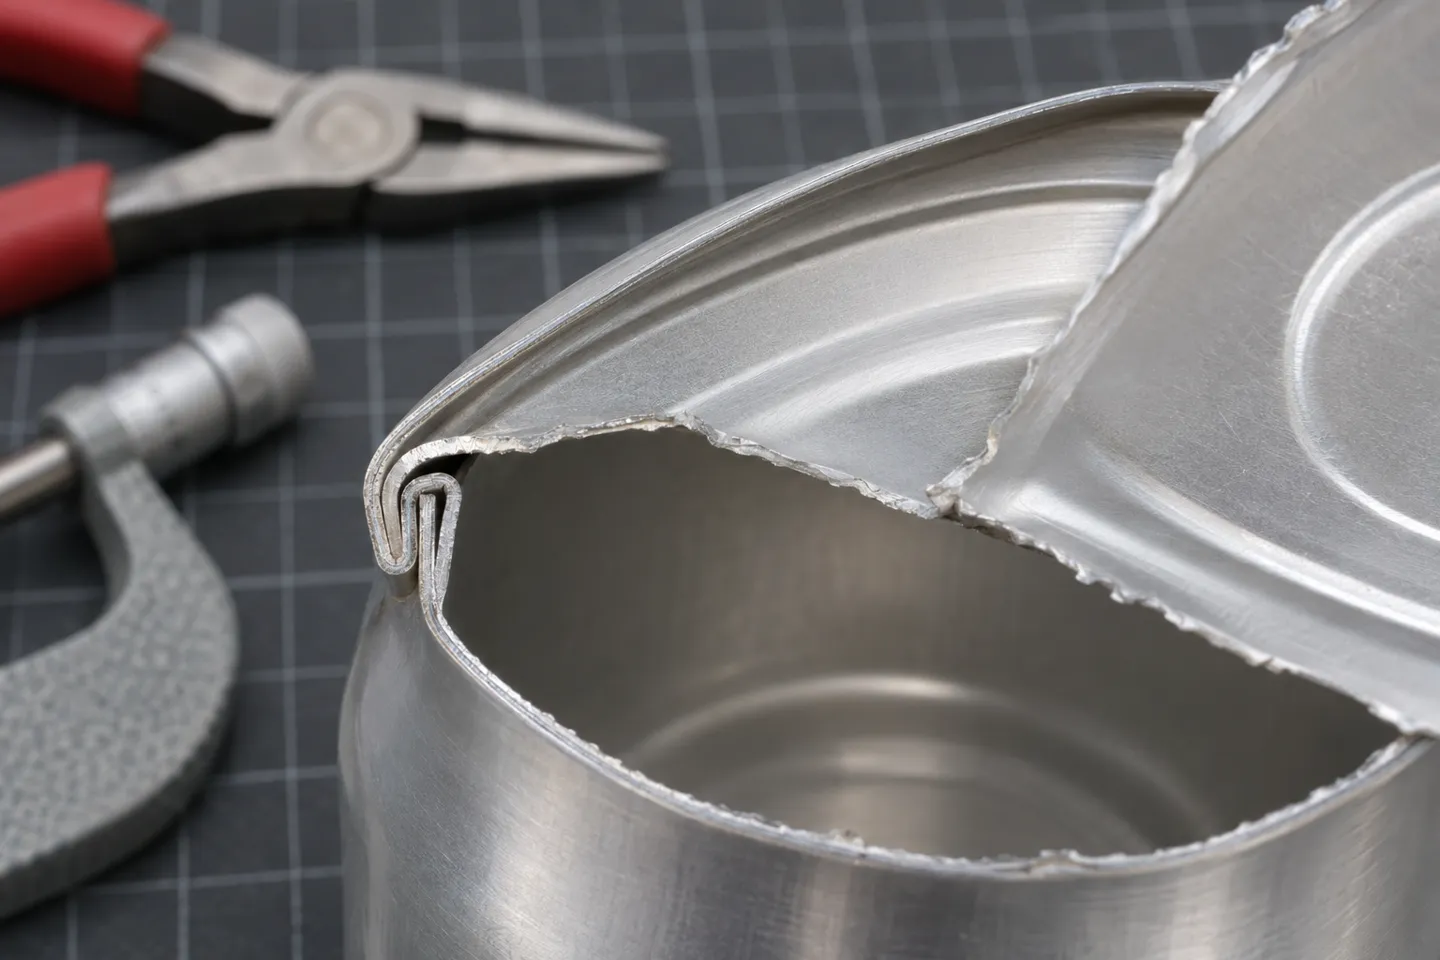
Overlap is the number the whole seam answers to. You rarely measure it directly. You calculate it from the other readings:
Overlap = CH + BH + t − W
where CH is cover hook length, BH is body hook length, t is the cover plate thickness from the can supplier’s spec sheet, and W is seam height (Quality Can Seams, 2026). Note what that formula implies: a seam can pass every external check and still have no overlap, because overlap hides inside. Industrial steel food cans are typically held to a minimum calculated overlap of about 1.00 mm. Small containers sit slightly lower. The slim cans common on desktop craft seamers run to looser numbers, above 0.4 mm in the Cannular documentation quoted earlier (HSYL Food Equipment, 2026; KegLand, 2026). Both are correct in their own scope, which is exactly why every number must travel with its can type.
Tightness is judged on the peeled cover hook’s wrinkles, and this is where published guidance genuinely contradicts itself. Craft-seaming sources grade tightness as a percentage and call 80 to 100% ideal (BMT/canseamers.com, 2026). Food-canning practice grades wrinkles on a 0 to 4 scale. Grade 0 means no wrinkles and 100% tightness. Grade 2, at about 70% tightness, is the minimum acceptable limit before rejection (HSYL Food Equipment, 2026). The two scales describe the same physical thing: count the share of the hook height that stayed unwrinkled, and you can speak either language. Grade 0 to 1 on the wrinkle scale is the same territory as the 80 to 100% zone.
Where the Numbers Come From
There is no universal seam spec table you can trust, and the contradiction above shows what happens when numbers travel without their scope. Target values must come from the container supplier’s specification sheet for the specific can and end you are running. The teardown log template is filled from that sheet, not from a handbook (HSYL Food Equipment, 2026; CFIA, 2026). A supplier who cannot produce a seam specification sheet, or a sample can torn down to those targets, is asking you to be their quality department.
Overlap: the seam’s master number
OL = CH + BH + t − W
Steel food cans
Hold overlap above 1.0 mm
Desktop slim cans
Hold overlap above 0.4 mm
First value to check when a batch leaks: it separates a can problem from a machine problem.
Laminated as a single page next to the seamer, these parameters turn seam quality from an opinion into a checklist that anyone on shift can run. They also hand you the vocabulary to demand specific evidence from suppliers instead of assurances.
Seam Parameters at a Glance
| Parameter | Measured How | What It Tells You | Typical Judgment |
|---|---|---|---|
| Seam height (W) | External micrometer | Overall seam formation and drift | Compare to supplier spec |
| Seam thickness (T) | External micrometer | Second-operation roll pressure | Tightest tolerance in practice |
| Countersink (CS) | Depth gauge | Seam tilt, base plate height | Uniform around the rim |
| Body hook (BH) | Teardown | First-operation roll setting | Supplier spec range |
| Cover hook (CH) | Teardown | End curl quality, first-op setting | Supplier spec range |
| Overlap (OL) | Calculated: CH+BH+t−W | Mechanical interlock strength | >~1.0 mm steel food cans; >0.4 mm desktop slim cans |
| Tightness | Wrinkle inspection after peel | Second-op compression | Grade 0-2 (≈70-100%), reject below |
Source: Quality Can Seams, HSYL teardown guide, KegLand, BMT
When the measurements come back out of range, the question stops being “is the seam bad” and becomes “which part is lying”. That is an attribution problem, and it has a table of its own.
Measurement tells you whether the seam is good. When it is not, the next question is who owns the failure.
Put these numbers on your own cans before the next batch: request the seam specification sheet for your exact can and end, plus seamed samples, up to 20 free.
Request Spec Sheet & SamplesWhy Seams Leak: Attribution and Fixes
A leaking can is an argument waiting to happen: the machine vendor blames the cans, the can supplier blames the machine, and you own the pallet of leakers. The way out is to attribute the failure before arguing about it. False seams alone have several distinct causes. They include a flange bent out of position, a damaged end, a mismatched can-and-end pairing, and product trapped over the flange during seaming (BMT/canseamers.com, 2026). Each cause has a different owner, which is why a matrix beats a hunch.
Field failures from small-batch operations follow the same pattern. One home-scale operation ran four consecutive batches with roughly 40% of cans leaking until systematic measurement separated machine setting from container fit (r/Homebrewing field report, 2022). A brewpub chasing intermittent leakers traced them to a dented can rim that no external check had caught. The team moved to sampling rims as well as seams (r/TheBrewery field report, 2019). In another case the same seamer produced leaks for months. A machinist finally rebuilt its spindle with new bushings, a pure tooling-wear failure that no amount of can swapping would have fixed (r/TheBrewery field report, 2019).
Seam Failure Attribution Matrix
| Defect | Typical Root Cause | Owner | On-the-Spot Fix | Escalate When |
|---|---|---|---|---|
| False seam | Flange bent/mushroomed, damaged end, can-end mismatch, product over flange | Container or filling | Re-check flange condition and fill level; try a different can batch | Defect persists across two can batches |
| Pressure ridge absent or uneven | Roll pressure too low, or worn spindle/chuck | Machine | Re-set second-operation roll; inspect chuck and spindle wear | Ridge uneven after roll reset |
| Cut or sharp seam | Second-op roll too tight, chuck damage | Machine | Back off second-op pressure; check chuck face | Metal fragments or fracture lines appear |
| Wrinkles, low tightness | Second-op roll too loose, compound not compressed | Machine | Tighten second-op roll in small steps | Tightness below Grade 2 after adjustment |
| Long/short hooks | First-operation roll setting drifted | Machine | Re-set first-op roll to spec | Hooks out of range on three teardowns in a row |
| Leaking seam that looks normal | Compound or foil layer damaged, container micro-leak | Container | Swap end batch; run pressure-bath leak test | Same end batch fails pressure test |
Source: BMT troubleshooting guide, HSYL teardown guide, brewer field reports
Two habits keep the matrix honest. First, trust the pressure ridge. The faint, uniform impression the second-operation roll leaves on the inside wall of the can is a direct read of roll pressure. A sharp or missing ridge convicts the machine before any debate starts (HSYL Food Equipment, 2026). Second, keep teardown photos and written measurements as the only arbitration: “the seam looks fine” settles nothing, a Grade 3 wrinkle photo does.
One contradiction deserves an explicit ruling. Filling level and seam failure are routinely confused. Product trapped over the flange during seaming does cause false seams, so overfilling can create a leak.
The fill-height ruling: a full can below the flange line does not mechanically break a well-formed seam. Judge fill level against the flange, not by folklore.
None of these fixes mean anything if the parts you bought were never matched to each other in the first place.
Sourcing Cans, Ends and a Seamer as One System
Every failure mode in the matrix above becomes harder to blame and easier to prevent when one party is responsible for all three components. That is the procurement logic of the double seam. The seam is a joint property of body, end, and machine. So the specification sheet, the sample, and the acceptance test should cover all three together.
A practical acceptance package, built from everything established above:
Can-and-seamer acceptance checklist
- Written double seam specification sheet for your exact can and end, not a generic table.
- Sample cans seamed on the actual machine you will run, not a demo line.
- One teardown on the sample with overlap, hooks and tightness recorded against the sheet.
- Neck size and end type matched across can, end and seamer (202, 211, 300, 305, 307, 401, 502 are the standard neck series).
- An agreed inspection rhythm, external and teardown, before bulk production.
- A rule for disputes: teardown photos plus measurements decide.
Buying this way changes the conversation with suppliers. Instead of comparing can prices against machine prices separately, you ask one question: who can deliver the matched set and prove the seam? This is also where the procurement risk concentrates, because a supplier that sells only cans, or only machines, will always have somewhere else to point when a batch leaks.

We build our business around that question. At OUTSTANDING, the PET easy-open cans, the aluminum and full-open ends, and the desktop can sealing machines are produced and supported by the same team. Cans, ends and seamer arrive already matched instead of negotiated separately. Our machines are adjusted to your can and cap specifications, not the other way around. The sampling stage is where the seam gets proven. You can run your own teardown on samples before committing. Simple-custom samples ship within 48 hours, bulk orders in 3 to 5 days, and light customization starts at 1,000 units. Up to 20 samples are free, so the only cost of verifying the seam is one shipping fee. You can review our custom packaging and sampling policy or the desktop can sealing machines this process runs on.
Prove the Seam Before You Order
Cans, ends and desktop seamers from one team: seamed samples on your actual machine, seam spec sheet included, up to 20 samples free.
Start Your Free SamplingReferences
- Seam School (Craft Seaming). “How is a Double Seam made?” 2023. https://seamschool.com/how-is-a-double-seam-made/
- U.S. FDA. “Guide to Inspections of Low Acid Canned Food Manufacturers, Part 3.” 2014. https://www.fda.gov/inspections-compliance-enforcement-and-criminal-investigations/inspection-guides/guide-inspections-low-acid-canned-food-manufacturers-part-3
- AFDO. “A Guide to Can Defects and Basic Components of Double Seam Containers.” 2011. https://www.afdo.org/wp-content/uploads/2020/11/A_Guide_to_Can_Defects_and_Basic_Components_of_Double_Seam_Containers_acc_updated_2011.pdf
- Canadian Food Inspection Agency (CFIA). “Metal can defects: identification and classification.” 2026. http://inspection.canada.ca/en/preventive-controls/controls-food/metal-can-defects
- Quality Can Seams. “Important Calculations.” https://www.qualitycanseams.com/important-calculations
- KegLand. “Seam Troubleshooting, Cannular documentation.” https://docs.kegland.com.au/products/canning-equipment/cannular-compact-semi-auto-canning-machine-or-user-guide/seam-troubleshooting
- BMT Can Seamers (canseamers.com). “Can Seam Troubleshooting Guide.” https://canseamers.com/seam-checking-common-seam-problems/
- Ball Can Source. “202 B64 End Specs Double Seam.” https://www.cansource.com/assets/Uploads/Products/Documents/Ball-202-B64-end-specs-double-seam-1.pdf
- Market Research Future (via Yahoo Finance). “PET Beverage Packaging Market Size & Share Analysis.” 2023. https://finance.yahoo.com/news/pet-beverage-packaging-market-size-152700337.html
- Crown. “Seaming, Food Can Essentials.” 2026. https://www.crowncork.com/aerosol-food-packaging/essentials/seaming